
Jumat, 15 Januari 2016
Kamis, 07 Mei 2015
403 Forbidden Error When Submitting Form with wysiwyg editor
Most probably, your web server has mod_security enabled. The mod_security
feature scans all POST requests to the web site for forbidden words or
word combinations that might indicate that someone is trying to hack the
system. And if any of them exist, Apache returns the 403 Forbidden error. Common phrases that tend to trigger mod_security include curl, wget, set, file(, and system(, although there are many others.
To disable 'mod_security' for your website:
- In the root directory of your CS-Cart installation, open the .htaccess file.
- In this file, add the following part of code:
<IfModule mod_security.c> SecFilterEngine Off SecFilterScanPOST Off </IfModule> - Save the file.
- If it does not help, contact your server administrator.
Kamis, 26 Maret 2015
Cara Menampilkan daftar direktori/file di linux dengan ukuran MB
Perintah sederhana berikut akan menampilkan daftar file di linux dengan satuan ukuran MB
# ls -lrt --block-size=M
total 14M
-rw-r--r-- 1 root root 0M Mar 6 15:24 error.log
drwxr-xr-x 5 root root 1M Mar 6 22:19 public_html
-rw-r--r-- 1 root root 2M Mar 26 03:46 catatan
-rw-r--r-- 1 root root 12M Mar 26 03:46 access.log
Kamis, 05 Maret 2015
Langkah Instalasi apache, php, mysql pada centos server 5
Ini bro langkah-langkah Instalasi apache, php, mysql pada centos server 5
- sudo yum install httpd
sudo service httpd start
sudo yum install mysql-server
sudo service mysqld start
sudo /usr/bin/mysql_secure_installation
sudo yum install php php-mysql
PHP Modules
PHP also has a variety of useful libraries and modules that you can add onto your server. You can see the libraries that are available by typing:
yum search php- Terminal then will display the list of possible modules. The beginning looks like this:
php-bcmath.x86_64 : A module for PHP applications for using the bcmath library php-cli.x86_64 : Command-line interface for PHP php-common.x86_64 : Common files for PHP php-dba.x86_64 : A database abstraction layer module for PHP applications php-devel.x86_64 : Files needed for building PHP extensions php-embedded.x86_64 : PHP library for embedding in applications php-enchant.x86_64 : Human Language and Character Encoding Support php-gd.x86_64 : A module for PHP applications for using the gd graphics library php-imap.x86_64 : A module for PHP applications that use IMAP
To see more details about what each module does, type the following command into terminal, replacing the name of the module with whatever library you want to learn about.
yum info name of the module Once you decide to install the module, type:
sudo yum install name of the module You can install multiple libraries at once by separating the name of each module with a space.
Congratulations! You now have LAMP stack on your droplet!
We should also set the processes to run automatically when the server boots (php will run automatically once Apache starts):
sudo chkconfig httpd on sudo chkconfig mysqld on
Rabu, 04 Maret 2015
Cra konfigurasi virtual memory (Swap file) vps
How To Configure Virtual Memory (Swap File) on a VPS
Table of Contents & Preface
- Introduction - Requirements and Why
- Pros & Cons - Droplet
- Check if Enabled on your VPS
- Swap Partitions, Swap Files, & Disk Images
- Creating the Swap File
- Enabling and Disabling Swap
- Configuration, Priority and sysctl settings
- Conclusion
Preface
This article will cover the pros and cons of using virtual memory or a swap file (paging), determining if your droplet already uses virtual memory or paging, the differences between a swap partition and a swap file, information on how to create a swap file, and how to configure the system's "swappiness" (how likely it is to use virtual memory as well as determining the appropriate size to use).You can read more about Swap (Paging) and Virtual Memory on Wikipedia. It will answer a lot of questions outside the scope of this article.
A quote from the Paging (swap file) article on Wikipedia: (emphasis on the second paragraph for its clear explanation)
"In computer operating systems, paging is one of the memory-management schemes by which a computer can store and retrieve data from secondary storage for use in main memory. In the paging memory-management scheme, the operating system retrieves data from secondary storage in same-size blocks called pages. The main advantage of paging over memory segmentation is that it allows the physical address space of a process to be non-contiguous. Before paging came into use, systems had to fit whole programs into storage contiguously, which caused various storage and fragmentation problems."
"Paging is an important part of virtual memory implementation in most contemporary general-purpose operating systems, allowing them to use disk storage for data that does not fit into physical random-access memory (RAM)."
Introduction - Requirements and Why
What is it and why would I use it?
Whether you have a 512mb droplet or a 8gb droplet; Arch, Fedora, CentOS, Debian, or Ubuntu; applications or servers/daemons may need more memory (or sometimes more memory allocated) than you have physically. More specifically in our case, what has been allocated to the virtual server to get the job done.If you're dealing with any production server, you need to know that if virtual memory is not enabled and your system has no more free memory...then if a program or service - perhaps your web server - needs to allocate more memory, it will fail! Depending on your platform and configuration, this can result in many undesirable or unstable conditions including other applications (i.e. other processes than the one asking for memory) being forced to close to free the needed memory, to it failing and crashing the program - or whole server - entirely.
Because of this, I personally recommend anyone, on nearly any system - be it a droplet, dedicated server, your Windows PC or Mac or even your Android tablet or phone - should have at least a small amount of virtual memory enabled.
How it Works
Virtual memory allows your system (and thus your apps) additional virtual RAM beyond what your system physically has - or in the case of droplets, what is allocated. It does this by using your disk for the extra, 'virtual' memory and swaps data in and out of system memory and virtual memory as it's needed.You should be aware that reading/writing from disk (even DigitalOcean's lightning fast SSDs) is at least several times slower than reading/writing from real system RAM. While virtual memory will give you wiggle room, allow more applications/servers to run on one droplet and guard against out-of-memory errors, it is not a replacement solution in cases where you actually need more memory/to upgrade your virtual server.
While the contents of this article may seem trivial to seasoned admins, I feel it is valuable information for anyone using DigitalOcean's hosting services, especially those new to DigitalOcean, VPS systems in general, or to managing their own servers.
Requirements
The requirements are pretty simple and this technique should work on all distributions and droplet types - in fact, it will even work on your Android phone or tablet (if you have root & busybox installed).- a droplet or virtual server, powered on (or a dedicated server, a linux-based system, etc.)
- root terminal access (ssh, vnc, local)
- the commands free, swapon, swapoff, dd, mkswap will be used, and these all should be available on any platform you use with your droplet.
This isn't always the case with virtual servers, including DigialOcean's droplets.
Pros & Cons - Droplet
DigitalOcean's droplets use SSDs (solid state disks) which are several times faster than regular hard drives and do not suffer from low seek times (caused by a hard drive's head having to physically move across the disk to read data) and low IO requests per second. SSDs can read from multiple areas simultaneously while hard drives can generally only read from one area at a time.While it is never a good idea - especially with web, mail, db servers - to rely heavily on virtual memory, DO's SSDs help using virtual memory be less painful and more logical.
Pros
- Protection against OOM (out of memory) errors, crashes, memory-related system unpredictability/instability.
- Increases available memory to the system and allows more programs to be run concurrently & more safely
- DigtalOcean's SSD storage reduces VM-associated lag and thrashing while increases paging response times
Cons
- Thrashing is a possibility: when the system is busy and actively using on average more memory than is available physically, the VM system is forced to continually 'swap' program data to and from disk and in and out of RAM as needed. We have probably all seen the result of this in a Windows PC slightly overloaded with the hard drive seemingly grinding away endlessly. It's unbearably slow and not fun. It can, however, be avoided with correct configuration and this is one con that is not as bad here - again due to the speed of DigitalOcean's SSDs.
- Uses disk space, generally depending on system memory. If your droplet has 512mb, I recommend using 512mb-1.5gb for swap; however that is 512mb-1.5gb less space you will have available on your droplet's disk.
- It is generally recommended and preferred to use a dedicated disk partition for swap; however this is not possible in a droplet and we must use a swap file/disk image instead.
Check if Enabled on your VPS
It is entirely possible your configuration already makes use of virtual memory. The commands below will show you how to determine whether it is enabled or not, and if it is, it's size and configuration.Open a terminal or SSH/VNC to your server - these commands are all performed in a terminal or shell.
Don't forget, to make changes, you need to be root. You can check what user you are logged in with the command whoami. If it does not respond with root or 0, you can type
su to start a root shell.You can check if your droplet already has virtual memory enabled by typing the "free" command at the prompt in a terminal:
bash-root@my.droplet:/# freeThe "free" command shows your system's available physical and virtual memory.
If you have virtual memory enabled already, you can skip ahead to "A Note About Swap Partitions" and then the configuration section. When enabled, the output will look like this:
bash-root@my.droplet:/# free
             total       used       free     shared    buffers     cached
Mem:        361996     360392       1604          0       1988      54376
-/+ buffers/cache:     304028      57968
Swap:       249896          0     249896
bash-root@my.droplet:/# _
If it is not enabled, the output will look like this:bash-root@my.droplet:/# free
total used free shared buffers cached
Mem: 361996 360392 1604 0 2320 54444
-/+ buffers/cache: 303628 58368
Swap: 0 0 0
bash-root@my.droplet:/# _
You can also narrow down the output with free | grep Swap. This will only show the Swap: line, total, used and free VM. (Remember, by default, grep is case sensitive!)bash-root@my.droplet:/# free | grep Swap Swap: 249896 0 249896 bash-root@my.droplet:/# _
Swap Partitions, Swap Files, & Disk Images
A Note About Swap Partitions
Generally, for Linux-based systems, it is preferred to have a dedicated swap partition on your hard disk. Most systems will automatically do this during a normal installation, and if your swap is already configured, it may very well be possible it is setup with a partition. Unfortunately, other than configuring the below sysctl settings, resizing swap partitions is outside the scope of this article.You can however still use the method presented here to add a swap file and increase available virtual memory above and beyond the partitioned swap area. But if a swap is already configured and managed by the system, additional virtual memory may be unnecessary and it may be better to leave the default settings unless you know what you are doing.
What is a Swap File?
Instead of using a dedicated partition, some systems (especially Windows) will store their virtual memory in a special file. This is also an option when partitioning is not possible or feasible. On Linux, this file is actually a disk image.What is a Disk Image?
A disk image normally includes files and information about those files, as well as the filesystem that contains them.Examples include your droplet's snapshots (which I like to call snowflakes - frozen droplets), a function which creates a disk image of your entire droplet for backup, duplication, migration, etc.
Another prime example is most Linux distributions (or distros) come as disk images, usually in .iso format, which allows you to either mount them or burn them to a disk.
Whatever way you use an image, the important thing to remember is that they store the filesystem information, and as such they can be used just like the filesystem they were imaged from - or recreate it entirely.
Creating the Swap File
In the case of a droplet, we cannot partition our storage, so we need to use a disk image. *NIX operating systems use a dedicated filesystem for swap, this is why as I said above that using a partition is preferred. What we can do is create an empty disk image sized according to required virtual memory, initialize it with a swap filesystem, then turn it on.First, you need to decide where to put this file. You need to have enough space free on the partition you put it on for whatever amount of MB you use for swap, eg. 512mb of swap creates a ~512mb swap file.
You can use the command df -h to view your mounted partitions and filesystems, as well as their sizes & free space.
I recommend placing this file in /var and calling it "swap.img". We will cd to /var and create this file, then set its permissions to 600.
NOTE: It is important for security to set the file permissions to 600 so no other users can read the file directly, otherwise system memory could be read or worse.
bash-root@my.droplet:/# cd /var
bash-root@my.droplet:/var# touch swap.img
bash-root@my.droplet:/var# chmod 600 swap.img
bash-root@my.droplet:/var# _
Sizing
Now we will size the file. Sizing is important, and the best size will vary depending on your system and use case.In general, I recommend 1-2x the available system RAM. So, if you have a 512mb droplet, use 512mb-1gb swap. If you have a 1gb droplet use 1gb-2gb swap, etc. This is not a hard and fast rule, for example if you have a 4gb droplet it may be best to use little (512mb) or no swap at all.
It entirely depends on your use, but these instructions are tailored for a 512mb droplet. We will use the command dd to fill our swap file with zeroes or nothingness to stretch it to the size we need. In this case we are using 1gb or 1024mb. This may take a minute.
bash-root@my.droplet:/var# dd if=/dev/zero of=/var/swap.img bs=1024k count=1000
1000+0 records in
1000+0 records out
1048576000 bytes (1.0 GB) copied, 4.0868896 s, 253 MB/s
bash-root@my.droplet:/var# _
Preparing the Disk Image
And here, we will initialize the swap filesystem.bash-root@my.droplet:/var# mkswap /var/swap.img Setting up swapspace version 1, size = 1020 GiB no label, UUID=72761533-8xbe-436l-b07e-c0sabe9cedf3 bash-root@my.droplet:/var# _Once that's done, it's ready for use!
Enabling and Disabling Swap
Enable your Swap File
We will use swaponto enable it. Upon success there will be no output, but you can check withfree.bash-root@my.droplet:/var# swapon /var/swap.img
bash-root@my.droplet:/var# free
total used free shared buffers cached
Mem: 503596 478928 24668 0 38832 102384
-/+ buffers/cache: 337712 165884
Swap: 1048572 1780 1046792
bash-root@my.droplet:/var# _
You can use swapoff /var/swap.img to turn it off.Enable your Swap File During Boot
Note that swapon only enables the file for your current boot; if you reboot it will not come back online unless you either script yourswapon to run at boot, or change your /etc/fstab which in most cases is much easier and is the method we will use here.All you have to do is add a line to your
/etc/fstab file
to make it ready at boot. Be careful! This file can break your system
if it isn't formatted correctly or if it's overwritten. If you put your
swap.img in /var, you can copy/paste the below command with no issue.
(If you type it, make sure there are two > symbols, using one will
overwrite the file instead of appending a line at the end.bash-root@my.droplet:/var# echo "/var/swap.img none swap sw 0 0" >> /etc/fstab bash-root@my.droplet:/var# _
Configuration, Priority and sysctl settings
Configuration
Once your swap space is online, there is not much that needs to be configured. You could even stop here, if you aren't interested in the nitty gritty details - once it's enabled generally it will work just fine for most setups.Priorities
If you are going to be using swap files or partitions spanning multiple devices and device types (unlikely on a droplet), you may want to order the priority for each of these swap areas, either using the faster or more idle storage over slower and/or busier storage. In most cases, you can specify the priority as a parameter to swapon or in your/etc/fstab.The system will use swap areas of higher priority before using swap areas of lower priority.
swaon -p Example:bash-root@my.droplet:/var# swapon -p 100 /var/swap.img bash-root@my.droplet:/var# swapon -p 10 /mnt/SecondDrive/swap.imgAnd, for
/etc/fstab priorities can be set using the pri= parameter, like this:/var/swap.img none swap defaults,pri=100 0 0 /mnt/SecondDrive/swap.img none swap defaults,pri=10 0 0
sysctl settings (and sysfs)
We will use the command sysctl to change settings dedicated to the Linux virtual memory manager.There is only one setting I would recommend changing:
vm.swappiness. This setting tells the Linux kernel/VM handler how likely it should be to use VM. It is a percent value, between 0 & 100.If you set this value to 0, the VM handler will be least likely to use any available swap space, and should use all available system memory first. If you set it to 100, the VM handler will be most likely to use available swap space and will try to leave a greater portion of system memory free for use.
I personally recommend using a value of 30%, this should be a happy medium between swapping and system memory. Please note that this value is more of a target goal than a hard rule.
Below is an example on how to modify sysctl settings. For more info, you can type
sysctl --help or man sysctl.bash-root@my.droplet:/var# sysctl -w vm.swappiness=30 vm.swappiness = 30 bash-root@my.droplet:/var# _You can also run
sysctl -a to list ALL sysctl options (not just VM) or sysctl -a | grep vm..Or, to view a single setting (you can change the key name after the grep command for each setting):
bash-root@my.droplet:/var# sysctl -a | grep vm.swappiness
vm.swappiness = 30
bash-root@my.droplet:/var# _
Selasa, 03 Maret 2015
Cara Instalasi Apache, mysql, php pada centos 7
sumber : https://www.digitalocean.com/community/tutorials/how-to-install-linux-apache-mysql-php-lamp-stack-on-centos-7
Introduction
A "LAMP" stack is a group of open source software that is typically installed together to enable a server to host dynamic websites and web apps. This term is actually an acronym which represents the Linux operating system, with the Apache web server. The site data is stored in a MySQL database (using MariaDB), and dynamic content is processed by PHP.In this guide, we'll get a LAMP stack installed on an CentOS 7 VPS. CentOS will fulfill our first requirement: a Linux operating system.
Prerequisites
Before you begin with this guide, you should have a separate, non-root user account set up on your server. You can learn how to do this by completing steps 1-4 in the initial server setup for CentOS 7.Step One — Install Apache
The Apache web server is currently the most popular web server in the world, which makes it a great default choice for hosting a website.We can install Apache easily using CentOS's package manager,
yum.
A package manager allows us to install most software pain-free from a
repository maintained by CentOS. You can learn more about how to use yum here.For our purposes, we can get started by typing these commands:
sudo yum install httpd
sudo command, these operations get
executed with root privileges. It will ask you for your regular user's
password to verify your intentions.Afterwards, your web server is installed.
Once it installs, you can start Apache on your VPS:
sudo systemctl start httpd.service
http://your_server_IP_address/
If you see this page, then your web server is now correctly installed.
The last thing you will want to do is enable Apache to start on boot. Use the following command to do so:
sudo systemctl enable httpd.service
How To Find your Server's Public IP Address
If you do not know what your server's public IP address is, there are a number of ways you can find it. Usually, this is the address you use to connect to your server through SSH.From the command line, you can find this a few ways. First, you can use the
iproute2 tools to get your address by typing this:ip addr show eth0 | grep inet | awk '{ print $2; }' | sed 's/\/.*$//'
An alternative method is to use an outside party to tell you how it sees your server. You can do this by asking a specific server what your IP address is:
curl http://icanhazip.com
Step Two — Install MySQL (MariaDB)
Now that we have our web server up and running, it is time to install MariaDB, a MySQL drop-in replacement. MariaDB is a community-developed fork of the MySQL relational database management system. Basically, it will organize and provide access to databases where our site can store information.Again, we can use
yum to acquire and install our
software. This time, we'll also install some other "helper" packages
that will assist us in getting our components to communicate with each
other:sudo yum install mariadb-server mariadb
sudo systemctl start mariadb
sudo mysql_secure_installation
Y, and follow the instructions:Enter current password for root (enter for none):
OK, successfully used password, moving on...
Setting the root password ensures that nobody can log into the MariaDB
root user without the proper authorization.
New password: password
Re-enter new password: password
Password updated successfully!
Reloading privilege tables..
... Success!
The last thing you will want to do is enable MariaDB to start on boot. Use the following command to do so:
sudo systemctl enable mariadb.service
Step Three — Install PHP
PHP is the component of our setup that will process code to display dynamic content. It can run scripts, connect to our MySQL databases to get information, and hand the processed content over to our web server to display.We can once again leverage the
yum system to install our components. We're going to include the php-mysql package as well:sudo yum install php php-mysql
sudo systemctl restart httpd.service
Install PHP Modules
To enhance the functionality of PHP, we can optionally install some additional modules.To see the available options for PHP modules and libraries, you can type this into your system:
yum search php-
php-bcmath.x86_64 : A module for PHP applications for using the bcmath library
php-cli.x86_64 : Command-line interface for PHP
php-common.x86_64 : Common files for PHP
php-dba.x86_64 : A database abstraction layer module for PHP applications
php-devel.x86_64 : Files needed for building PHP extensions
php-embedded.x86_64 : PHP library for embedding in applications
php-enchant.x86_64 : Enchant spelling extension for PHP applications
php-fpm.x86_64 : PHP FastCGI Process Manager
php-gd.x86_64 : A module for PHP applications for using the gd graphics library
. . .
yum info package_name
Description which will have a longer explanation of the functionality that the module provides.For example, to find out what the
php-fpm module does, we could type this:yum info php-fpm
. . .
Summary     : PHP FastCGI Process Manager
URL         : http://www.php.net/
License     : PHP and Zend and BSD
Description : PHP-FPM (FastCGI Process Manager) is an alternative PHP FastCGI
            : implementation with some additional features useful for sites of
            : any size, especially busier sites.
yum install command like we have been doing for our other software.If we decided that
php-fpm is something that we need, we could type:sudo yum install php-fpm
yum install command, like this:sudo yum install package1 package2 ...
Step Four — Test PHP Processing on your Web Server
In order to test that our system is configured properly for PHP, we can create a very basic PHP script.We will call this script
info.php. In order for Apache
to find the file and serve it correctly, it must be saved to a very
specific directory, which is called the "web root".In CentOS 7, this directory is located at
/var/www/html/. We can create the file at that location by typing:sudo vi /var/www/html/info.php
<?php phpinfo(); ?>
If you are running a firewall, run the following commands to allow HTTP and HTTPS traffic:
sudo firewall-cmd --permanent --zone=public --add-service=http
sudo firewall-cmd --permanent --zone=public --add-service=https
sudo firewall-cmd --reload
The address you want to visit will be:
http://your_server_IP_address/info.php
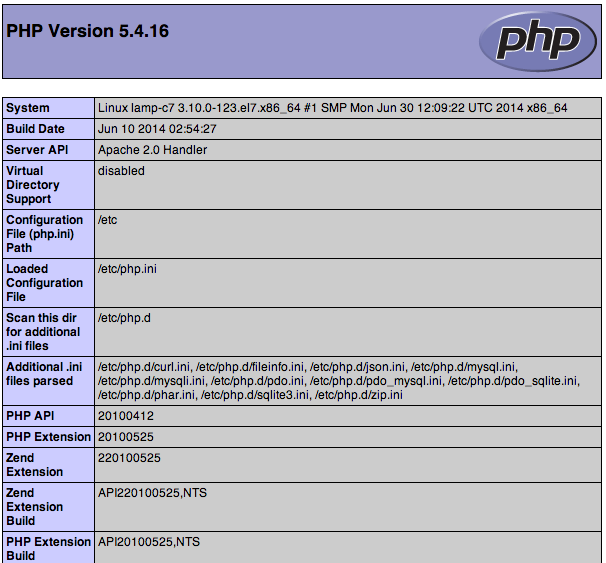
This page basically gives you information about your server from the perspective of PHP. It is useful for debugging and to ensure that your settings are being applied correctly.
If this was successful, then your PHP is working as expected.
You probably want to remove this file after this test because it could actually give information about your server to unauthorized users. To do this, you can type this:
sudo rm /var/www/html/info.php
Kamis, 26 Februari 2015
Cara melakukan Kompresi Tar.Gz Linux
TAR
Tar is a very commonly used archiving format on Linux systems. The advantage with tar is that it consumes very little time and CPU to compress files, but the compression isn’t very much either. Tar is probably the Linux/UNIX version of zip – quick and dirty. Here’s how you compress a directory:# tar cvf archive_name.tar directory_to_compress
And to extract the archive:
# tar -xvf archive_name.tar.gz
This will extract the files in the archive_name.tar archive in the current directory. Like with the tar format you can optionally extract the files to a different directory:
# tar -xvf archive_name.tar -C /tmp/extract_here/
TAR.GZ
This format is my weapon of choice for most compression. It gives very good compression while not utilizing too much of the CPU while it is compressing the data. To compress a directory use the following syntax:# tar zcvf archive_name.tar.gz directory_to_compress
To decompress an archive use the following syntax:
# tar -zxvf archive_name.tar.gz
This will extract the files in the archive_name.tar.gz archive in the current directory. Like with the tar format you can optionally extract the files to a different directory:
# tar -zxvf archive_name.tar.gz -C /tmp/extract_here/
Langganan:
Komentar (Atom)